
Name outcomes and write summaries
Use stable outcome codes for integrations and clear labels for the team.
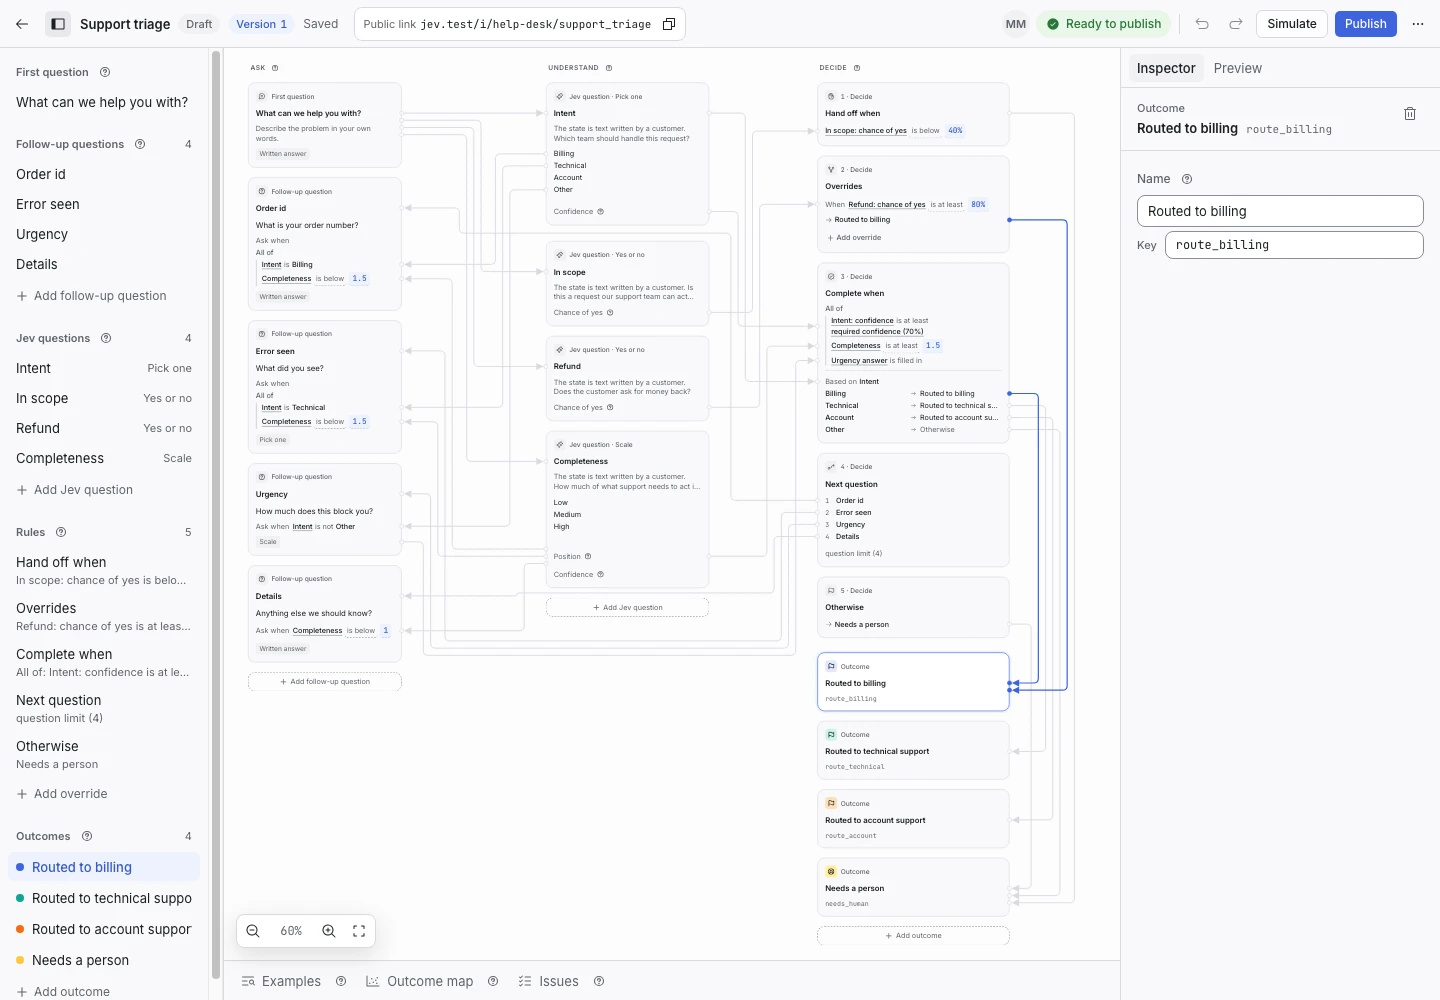
Product screen with sample data. Intake is the previous working name.
Name an outcome
An outcome states the next step for a completed request. Use a label such as Routed to billing or Needs a person.
- Select Outcomes.
- Add or select an outcome.
- Enter its name.
- Check the key shown in the inspector.
- Connect the outcome to a rule or mapping.
The key is the value an integration receives. Names can change during setup, but keys that published content or examples use must stay stable.
Keep the handoff outcome
The needs_human outcome produces the handoff status. Other final outcomes produce complete.
A handoff is a valid end state. It tells a person to continue the work.
Write the summary template
The summary uses text you write and values you insert. The model does not generate it.
For example:
{outcome.label}. Completeness {completeness.legend}.
This example assumes that the request type has a criterion with the key completeness. Use the inspector’s value controls to select values that exist.
Keep a summary short. Put the outcome first and add only the detail an agent needs.
Write the confirmation message
The applicant receives a confirmation message after the request ends. Use it to explain that the team has received the request.
Applicants do not see the internal outcome, summary, or judgments. Do not promise a response time that your team cannot provide.
Connect an external system
Your integration can read verdict.code and summary from the API. It must create or update an external ticket itself. ClientStack does not make that external change inside the decision loop.